
This article is to demonstrate how to use Unity's animation system double as a visual scripter.
Although we will still be making a script, it only consist of three functions, and the longest one is only three lines of code. In this 2D project I created a turret that I want to start firing when the player reaches a certain distance from the turret. You could also use triggers, raycasts, etc, but for this tutorial I chose the simplest possible.

Let us begin with just hanging up our variables. Our Lazer Turret will create a GameObject of our lazer that already has a script on it. All the lazer's script does is have it use a "Move Towards" command to make it more and a script on it that handles the health and damage items of the project (that is not for this tutorial.)

Now lets set up our Start Function. Here we assign what the target will be, which I want to be the Player. I use "FindGameObjectWithTag" because it is just more general, so in case I have multiple characters that have different names this line will always find who it needs to. And also here we create link our public variable to the speed in which the Animator plays. This will become clear in a moment.

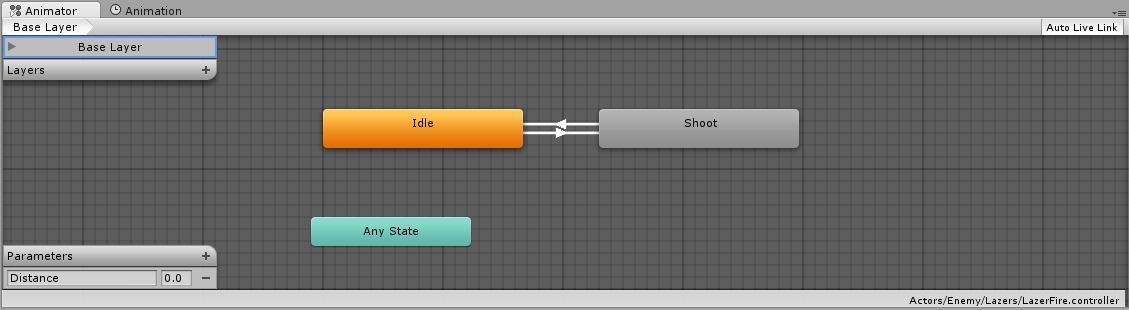
Now, our Update Function, which updates every frame. The first line is in case the script was not able to access the target at the start of the level. This might happen if you spawn your character into the scene instead of placing it in through the editor. Next, I assign my float value distance to the amount of distance the player is from the turret. Then I pass that variable into the Parameter in the Animator named "Distance."

Next we have our Function Shoot Lazer. Here all we do is create our lazer bullet prefab. We have no conditions scripted into the script, all we are doing through out the script is collecting data. Mecanim is going to actualize it for us.

I also have this function that literally is just a place holder.


Here is our inspector where we can change all the needed information. Before I wrap up, I want to re address a particular line of code.
anim.speed = fireRate;
This line changes the speed of the entire Animator Controller, not just one animation. Keep that in mind. If you want to change the speed of a certain specific animation, there are a couple of ways to do so which you can find in the Scripting Reference on unity's website.
Although we still did dive into some script, we used very basic coding to create a very customizable object. Mecanim can be used for easing many more processes and can be used to create very elaborate event systems without having to type much code or having to send message after message through out your scripts.
If this tutorial was helpful, or any other we have created, please visit support.TakeThisStudios.com where you can get access to much more information and get ahold of any Game Assets you require. Such as this source files for this tutorial. If you like the efforts we try to achieve, then please consider donating some pocket change to help further our goal of providing resources and asset for developers.
If you ever wish to see more, then just visit our Official Site!
Thank you very much!
No comments:
Post a Comment